You’ve got good taste. You like a well-made cocktail. And you’re not about to roll up to your next gathering serving drinks from a plastic rolling cart that looks like it came straight out of a college common room.
Let’s fix that.
Making a DIY bar cart that actually looks like it belongs in your living room, not in a freshman dorm, is more than just slapping together a few boards and wheels.
It’s about thoughtful design, quality materials, and that final layer of polish that quietly says, “Yeah, I built this. And it looks damn good.”
Here’s how to do it right, from the frame to the finish.
Step 1: Choose the Right Materials (No Plastic Tubs Allowed)
Solid, Stylish, and Sophisticated
Let’s start with the backbone. If you want your bar cart to look expensive, not like a college hack job, you need to skip the particleboard and plastic crates.
Here are a few material ideas that hit the sweet spot between budget and polish:
- Solid Wood: Walnut, oak, pine, or even maple are great picks. Walnut brings that rich, mid-century modern vibe. Pine is a bit cheaper but still has a warm tone when stained.
- Metal: Galvanized steel, black iron pipes, or aluminum tubing all scream industrial chic without screaming, “I built this in a panic before the party.”
- Marble or Tile Accents: A little goes a long way. You can add a marble inlay to the top shelf or even use marble-patterned contact paper for a luxe look on a budget.
Smart Design Choices
Here’s what gives a bar cart structure and personality:
- Two to Three Shelves: You’ll need space for bottles, glassware, mixers, and a few decorative items. At least two shelves are a must.
- Hanging Stemware Rack: Keeps wine glasses out of the way and adds a touch of class.
- Removable Top Tray: Makes serving easier and adds that restaurant-tier versatility.
- Casters (Wheels): Choose high-quality wheels—think black rubber or antique brass. No office chair wheels.
Step 2: Build a Structure That Holds Up

Bar carts are meant to carry weight. Bottles, glasses, tools—they all add up. A wobbly cart is not just annoying; it’s dangerous (especially after a couple of drinks).
The Framework
If you’re starting from scratch:
- Use steel pipes or aluminum tubes for the frame.
- Pine or hardwood boards for the shelves.
- Casters rated for at least 50 lbs each.
Or repurpose a sturdy piece like an old microwave cart or vintage TV stand. Just make sure it’s solid and doesn’t shake when you touch it.
Thrillist’s Custom Bar Cart is a great build for beginners. It uses:
- 18” and 12” steel pipes
- 1” x 12” x 24” pine boards
- Industrial flanges
- 1.5” rubber casters
You can assemble the whole thing in an hour, and the total cost lands around $180.
Assembly Tips
Here’s a general rundown based on the Thrillist plan:
- Bottom Shelf: Mark the four corners where your flanges will go. Drill and attach them. Then screw in the 18” steel pipes.
- Middle Shelf: Attach another set of flanges to the top of the 18” pipes. Add the middle shelf. Screw in 12” pipes above that.
- Top Shelf: Top it off with a final board and secure with flanges.
- Casters: Flip the cart over and attach your wheels.
Tools You’ll Need
- Power drill
- Screwdriver
- Measuring tape
- Sandpaper (don’t skip this—rough wood = regret)
Step 3: Finishing Touches That Actually Matter
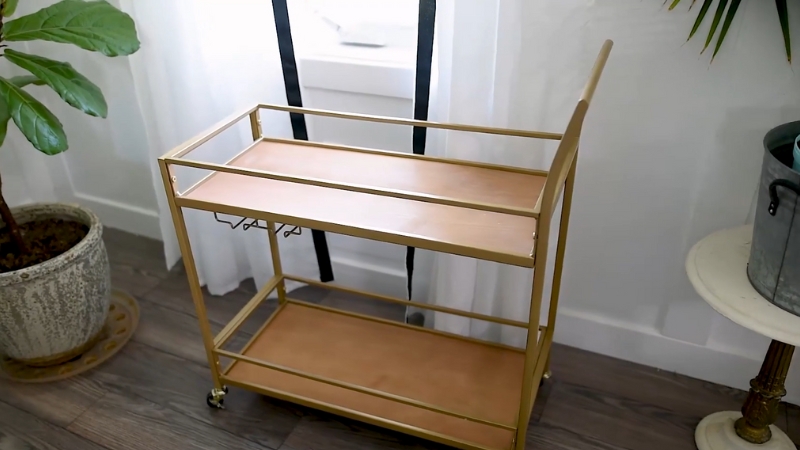
Wood Finishes
A good stain or paint job can make your cart look 10x more expensive.
- Dark Stains: Walnut, espresso, or mahogany = classic and elegant.
- Lighter Stains: Natural or honey tones give a modern, Scandinavian feel.
- Paint: Matte black, navy, or deep green can look amazing if done cleanly.
Metal Finishes
- Spray-paint your steel pipes or metal hardware with oil-rubbed bronze, brushed gold, or matte black.
- Use metallic spray paint on repurposed parts for a cohesive, high-end finish.
- Consider adding a piece of neon backlit signs behind your cart—it instantly elevates the ambiance.
Details That Make a Difference
- Add marble contact paper or ceramic tile to the top shelf.
- Choose sleek handles (window sash pulls or leather loops work well).
- Avoid anything too shiny or fake-looking.
Need inspiration? The Ombre Bar Cart by The Spruce Crafts transformed a basic TV stand using two tones of paint—total cost? $22. But it looks like something out of a boutique.
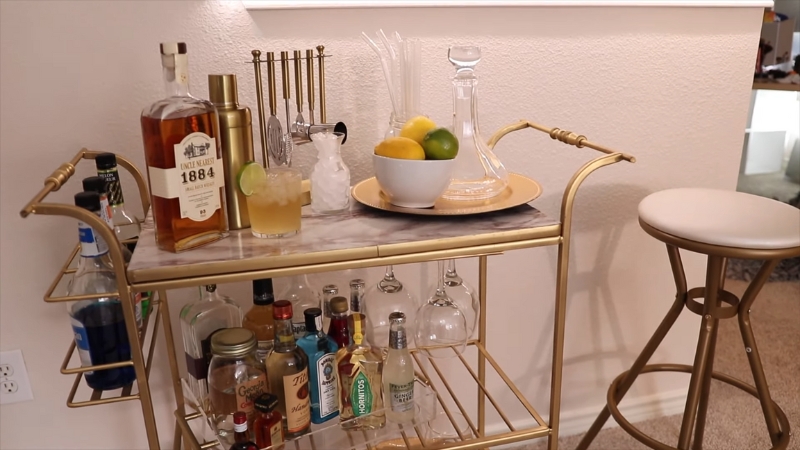
Step 4: Style It So It Doesn’t Look Like a College Project
The goal is to make your bar cart look curated—not like you emptied your entire liquor cabinet onto it.
Keep It Clean
- Use a tray to group smaller items like bitters, napkins, and bar tools.
- Limit yourself to 5–7 bottles on display.
- Store extras elsewhere (or behind closed doors if you’re repurposing a cabinet).
Add Visual Layers
- A small plant or vase of greenery goes a long way. Eucalyptus, anyone?
- Stack a couple of cocktail books or coasters for added texture.
- Consider adding a cake stand or riser to vary the height of your display.
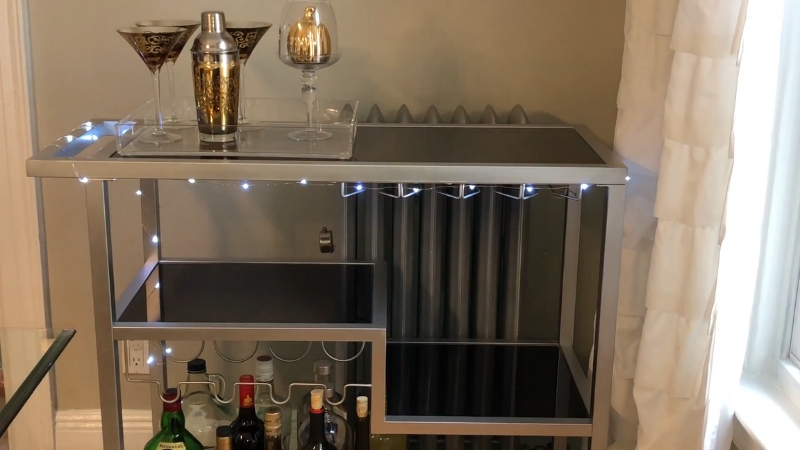
Lighting Matters
- Install a strip of LED lights under each shelf for a warm glow.
- Or place the cart near a sconce or lamp—good lighting helps highlight your hard work.
Step 5: Rookie Mistakes to Avoid
View this post on Instagram
Even with good materials and structure, styling missteps can tank the whole look.
Don’t Cheap Out
- Plastic bins, paper towel holders, or visible cords? Nope.
- Stick to glass, wood, and metal for visible components.
Stay On Theme
- Match the cart to your room’s aesthetic. If your space is rustic, don’t suddenly go full Art Deco. Cohesion is key.
Avoid Overcrowding
- Leave some breathing room. Too many bottles = chaos.
- Rotate in seasonal glassware or themed items if you like to switch it up.
Skip the Kitschy Decor
- Unless you’re going for intentional irony, ditch the neon signs and gag gifts. They belong at a bar crawl, not in your living room.
Great Builds to Learn From
Project Name
Materials Used
Cost
Style
Source
Industrial Bar Cart
Aluminum tubing, wood
Varies
Clean, sturdy, modern
Top Shelf DIY
Custom Bar Cart
Steel pipes + pine boards
~$180
Sleek and industrial
Thrillist
Rustic Industrial Bar Cart
Galvanized steel + dark wood
$50–$100
Warm, elegant, versatile
Jen Woodhouse
Ombre Bar Cart
Repurposed TV stand + paint
$22
Boutique-style on a dime
The Spruce Crafts
Handmade Weekly Bar Cart
Dark wood + white frame
~$50
Clean, store-bought look
Handmade Weekly
Bar Carts Can Be More Than Bars
Building your own industrial-style bar cart is so simple! This DIY bar cart is perfect for your kitchen or dining room!https://t.co/ScbBRKBR4X pic.twitter.com/JoPLDlBvoV
— My Creative Abode (@MyCreativeAbode) September 4, 2022
Even if you’re not a cocktail person, a well-made cart has other uses:
- Coffee Station: Add mugs, a French press, and syrups.
- Plant Stand: Style it with ferns, succulents, and a watering can.
- Mobile Office: Organize notebooks, a lamp, and a small printer.
It’s a compact, portable surface with style potential—use it how you want.
Tips Before You Start
- Start simple. If it’s your first project, pick a plan with clear instructions.
- Prep your materials. Sand wood, pre-drill holes, and double-check measurements.
- Add your signature. Whether it’s leather pulls, a splash of navy, or an etched tray, make it yours.
- Keep it clean. Wipe it down regularly, restyle it seasonally, and take care of the materials you chose.
Oh, and once it’s done? Show it off. Builders like Jen Woodhouse and Handmade Weekly encourage posting your results and even offer support if you get stuck. You’re not alone in this.
Bottom Line
@markferris 🌺🤍CUTE🤍🌺 building a barcart! What ya fancy? 🥂 ☕️🥛🥤🥃 . . . Love this corner! #barcart #diy #homereno #interior #fyp #foryou #apartment ♬ original sound – MarkFerris
Building your own bar cart doesn’t just save money—it gives you a piece of furniture with character, style, and function. Done right, it’s a showstopper. Not a single person will ask if you got it on sale at Target, and you’ll never have to pretend a dorm cart is “vintage” again.
Grab your tools. Pick your vibe. And go build something that’ll make you proud to pour a drink behind.